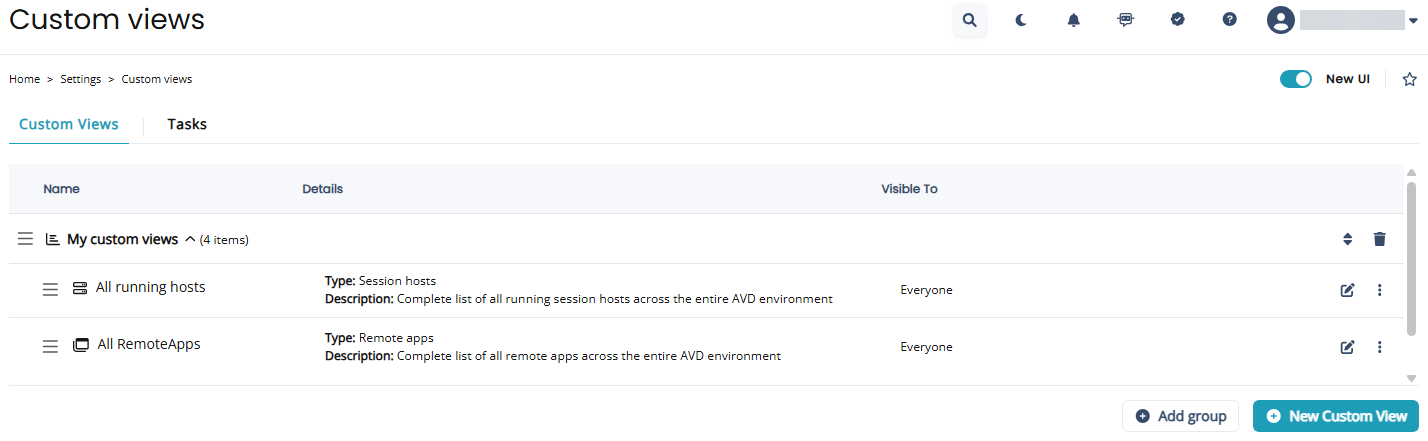
Create a custom view
Nerdio Manager allows administrators to create custom views that best represents their workflows. Multiple views can be created and one of the views can be designated as the default view.
For example, if you manage host pools across several Workspaces, there is no need to keep jumping back to the Workspaces list to switch from one Workspace to the next to work with all the host pools. With custom views, you can combine similar data on a single page across the environment.
Note: You can run bulk actions like Run script, Restart, and Power off on session hosts in custom views.
To create custom views:
-
Navigate to Settings > Custom Views.
-
Select New Custom view.
-
Enter the following information:
-
Name: Type the custom view's name.
-
Description: Type the description of the custom view.
-
Type: From the drop-down list, select the type of information you want to see in the custom view.
Note: The following types are available -- host pools, session hosts, user sessions, schedule configs, remote apps, desktop images, and Intune devices. Each type has different customization options, as explained below.
-
Visible To: From the drop-down list, select who should be able to see this custom view.
Note: You can make this custom view visible to any of the following:
-
Only you.
-
Everyone.
-
Users assigned to built-in roles.
-
Users assigned to custom roles.
-
-
Sort by Column: From the drop-down list, select the column in the table to sort the contents by.
-
Sort Direction: From the drop-down list, select the sort direction.
-
Page Size: From the drop-down list, select the page size for the custom view.
-
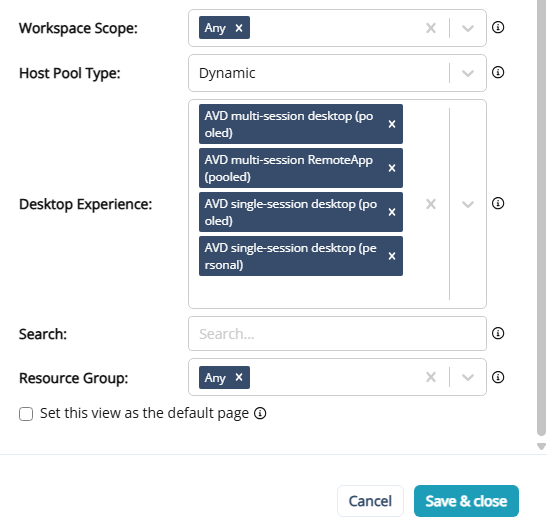
For Host pools, enter the following information:
-
Workspace Scope: From the drop-down list, select the workspaces to include in the custom view. The default is Any.
-
Host Pool Type: From the drop-down list, select whether the custom view is for dynamic or static host pools.
-
Host Pool Location: From the drop-down list, select the host pool location. You can select either Azure Cloud or Azure Local.
-
Desktop Experience: From the drop-down list, select the desktop experience(s) of the host pools that should be displayed in the custom view.
-
Search: Optionally, type the search string to limit the results of the items displayed in the custom view.
-
Resource Group: From the drop-down list, select which resource group(s) should be included in the custom view. The default is Any.
-
Optionally, select Set this view as the default page if you want to use this custom view as the default.
-
-
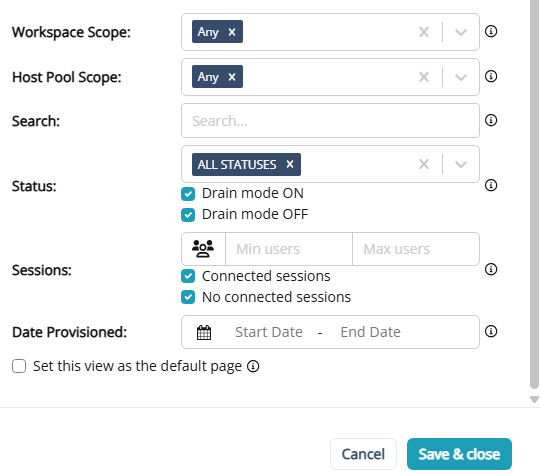
For Session hosts, enter the following information:
-
Workspace Scope: From the drop-down list, select the workspaces to include in the custom view. The default is Any.
-
Host Pool Scope: From the drop-down list, select the host pools to be included in the custom view within the selected workspaces. The default is Any.
-
Search: Optionally, type the search string to limit the results of the items displayed in the custom view.
-
Status: From the drop-down list, select the statuses to be included in the custom view. The default is All Statuses.
-
Optionally select Drain mode ON or Drain mode Off to display drain mode status in the custom view.
-
-
Sessions: Indicate if you want to include session hosts with sessions and the number of user sessions.
-
Optionally, select Connected sessions or No connected sessions to display the session connection status.
-
-
Date Provisioned: Optionally, filter by the date session hosts were provisioned.
-
Optionally, select Set this view as the default page if you want to use this custom view as the default.
-
-
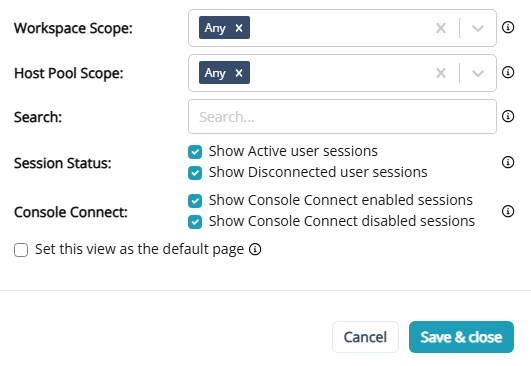
For User sessions, enter the following information:
-
Workspace Scope: From the drop-down list, select the workspaces to include in the custom view. The default is Any.
-
Host Pool Scope: From the drop-down list, select the host pools to be included in the custom view within the selected workspaces. The default is Any.
-
Search: Optionally, type the search string to limit the results of the items displayed in the custom view.
-
Session Status: Select the desired user session statuses to include in the custom view
-
Console Connect: Select the desired Console Connect statuses to include in the custom view.
-
Optionally, select Set this view as the default page if you want to use this custom view as the default.
-
-
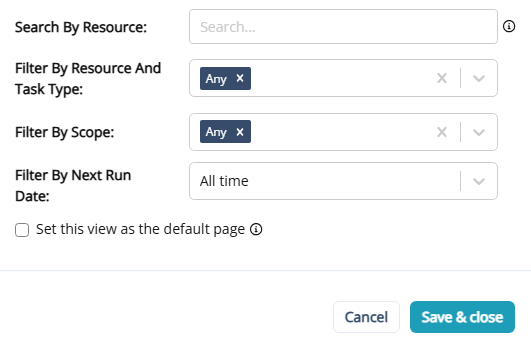
For Scheduled configs, enter the following information:
-
Search by Resource:Optionally, type the resource name to limit the results of the items displayed in the custom view.
-
Filter by Resource Type and Task Type: From the drop-down list, select the resource type and task type to be included in the custom view. The default is Any.
-
Filter by Scope: From the drop-down list, select the scope to be included in the custom view. The default is Any.
-
Filter by Next Run Date: From the drop-down list, select the next run date to be included in the custom view. The default is All time.
-
Optionally, select Set this view as the default page if you want to use this custom view as the default.
-
-
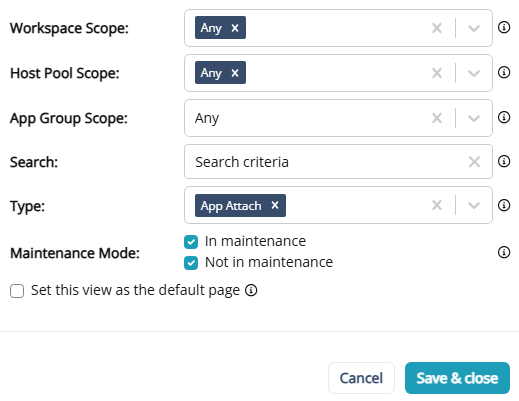
For Remote apps, enter the following information:
-
Workspace Scope: From the drop-down list, select the workspaces to be included in the custom view. The default is Any.
-
Host Pool Scope: From the drop-down list, select the host pools to be included in the custom view within the selected workspaces. The default is Any.
-
App Group Scope: From the drop-down list, select the app groups to be included in the custom view within the selected workspaces. The default is Any.
-
Search:Optionally, type the search string to limit the results of the items displayed in the custom view.
-
Type:From the drop-down list, select the remote app types to be included in the custom view. The default is Any.
-
Maintenance Mode: Select the maintenance modes to be included in the custom view.
-
Optionally, select Set this view as the default page if you want to use this custom view as the default.
-
-
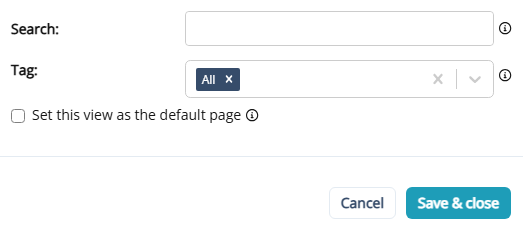
For Desktop images, enter the following information:
-
Search:Optionally, type the search string to limit the results of the items displayed in the custom view.
-
Tag:Optionally, type the tags to limit the results of the items displayed in the custom view.
-
Optionally, select Set this view as the default page if you want to use this custom view as the default.
-
-
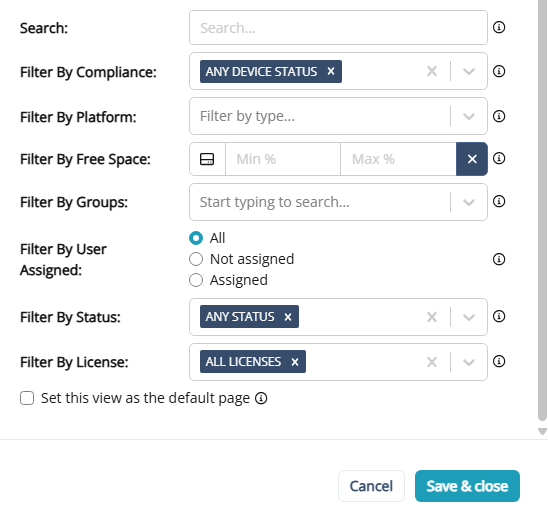
For Intune devices, enter the following information:
-
Search:Optionally, type the search string to limit the results of the items displayed in the custom view.
-
Filter by Compliance: From the drop-down list, select the compliance statuses to be included in the custom view.
-
Filter by Platform: From the drop-down list, select the platforms to be included in the custom view.
-
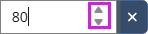
Filter by Free Space: Enter the free space range to be included in the custom view. You can enter a minimum percentage and/or a maximum percentage or use the arrows to adjust the numbers.
-
Filter by Groups: From the drop-down list, select the groups to be included in the custom view.
-
Filter by User Assigned: Select the user assignment to be included in the custom view.
-
Filter by Status: From the drop-down list, select the statuses to be included in the custom view.
-
Filter by License: From the drop-down list, select the license types to be included in the custom view.
-
Optionally, select Set this view as the default page if you want to use this custom view as the default.
-
-
-
Once you have entered all the desired information, select Save & close.
The new custom view is now available at the top of the main menu.